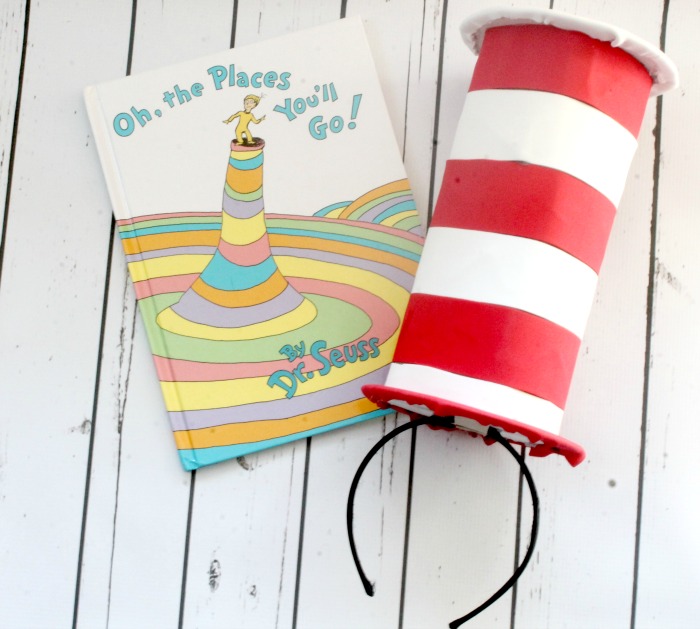
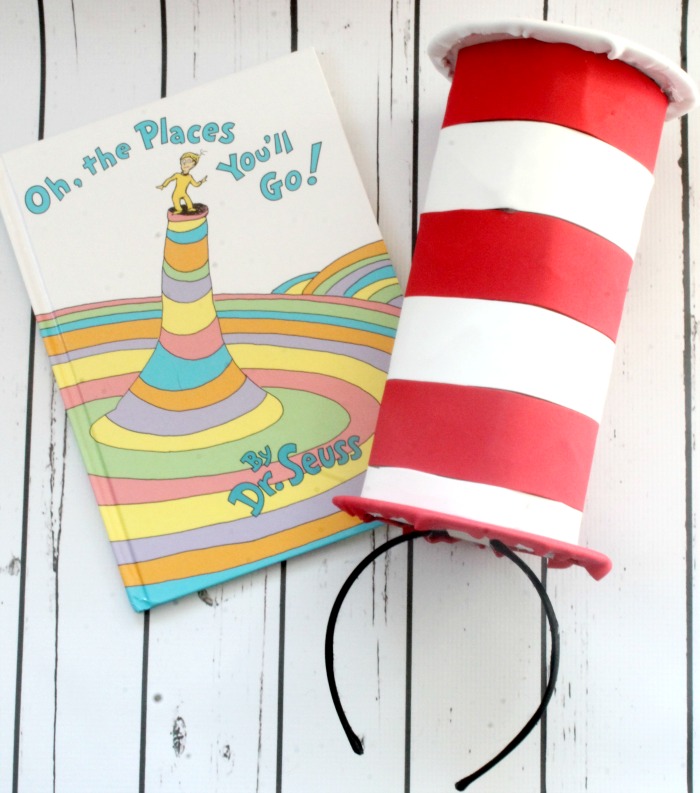
These DIY homemade Dr Seuss Hats are so easy and fun. And since they don’t require a lot of work to make, you can easily make several hats all at once for costumes, parties or just for fun. With Dr. Seuss’s birthday coming up, they’ll be lot’s of fun Cat in The Hat activities planned all over the country. At my daughters school they put together a big Dr Seuss parade. It’s a lot of fun for the kids because they get to wear a costume of their favorite Dr. Seuss character. This year my daughter will be going as Cat in The Hat and wearing one of these homemade Dr Seuss hats. She is SUPER EXCITED!
Supplies Needed For DIY Dr Seuss Hat Craft
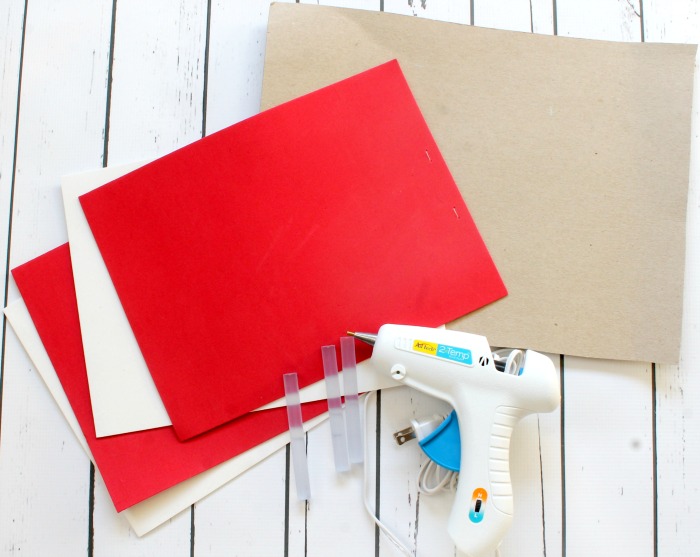
To make these homemade Dr Seuss hats you’ll need a few supplies. You can pick all of these supplies up at your local Walmart, Dollar Tree, etc. Or if you like to convenience shop like I do you can pick everything up on Amazon and have it shipped right to you! Isn’t online shopping fantastic! Here’s what you need to make 1 hat.
- 2 Red Pieces and 2 White of square foam sheets like these.
- Scissors
- Cardboard
- Hot glue gun and glue sticks
- Black headband
In a hurry? Check out these very inexpensive Dr. Seuss costumes.
When making these homemade Dr Seuss hats I recommend using a hot glue gun that has a low and a hot temperature to it. The reason is, you are working with foam and cardboard. Foam needs a low temp glue gun and cardboard sticks better with hot temperature glue gun. You can use either but I find it works better when you use a dual temperature glue gun.
How to Make Homemade Dr Seuss Hats
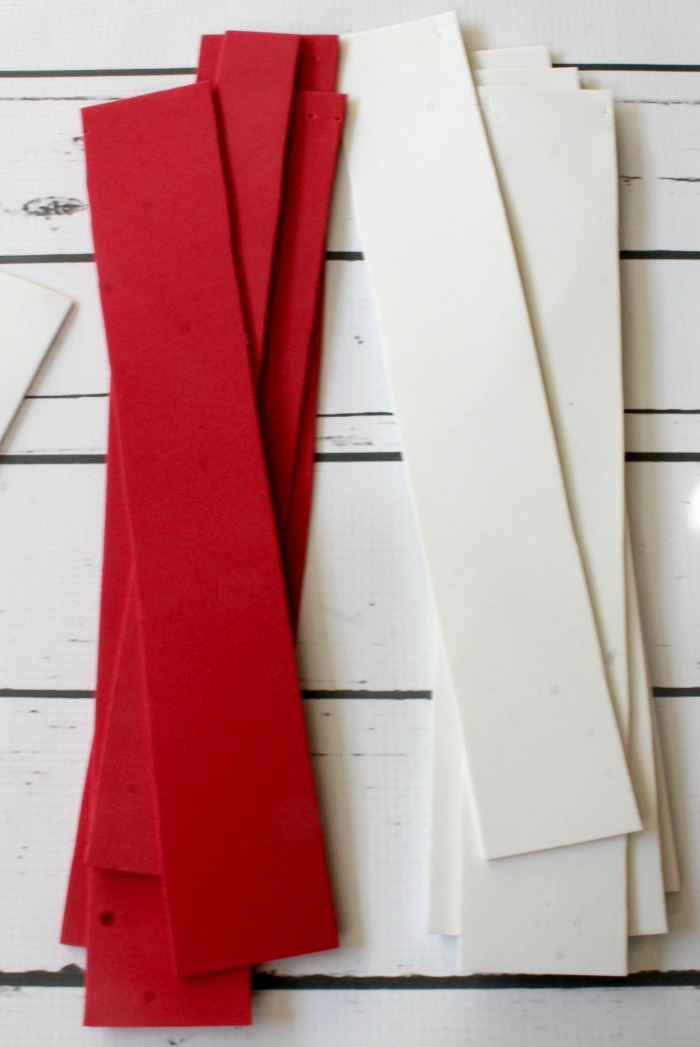
Ok, let’s get started making this adorable Dr Seuss hat craft. First your going to take one sheet of both white and red foam sheets and cut them long ways into 1 1/2 inch strips.
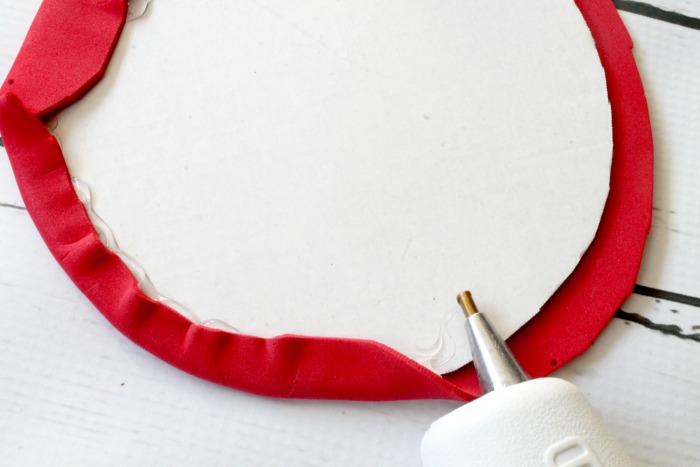
Next take the other foam sheets and cut a large circle into each of them. This will be for the base and top of your hat.
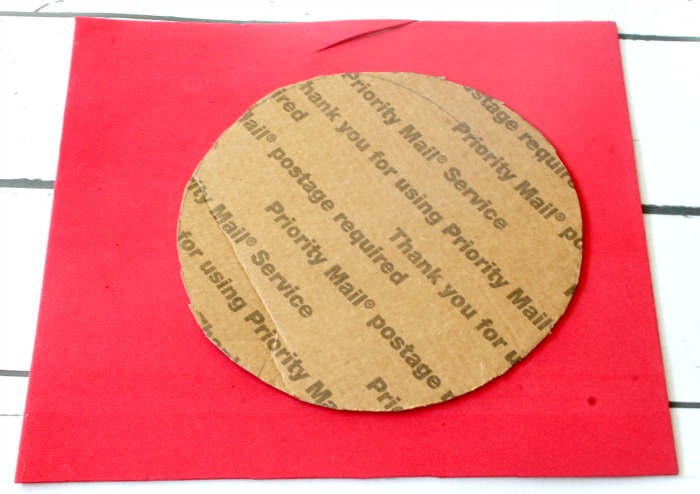
You’ll want to cut out an identical piece of cardboard to match each of the circles. Take your glue gun and glue the foam sheets over the top of the card board and set aside.
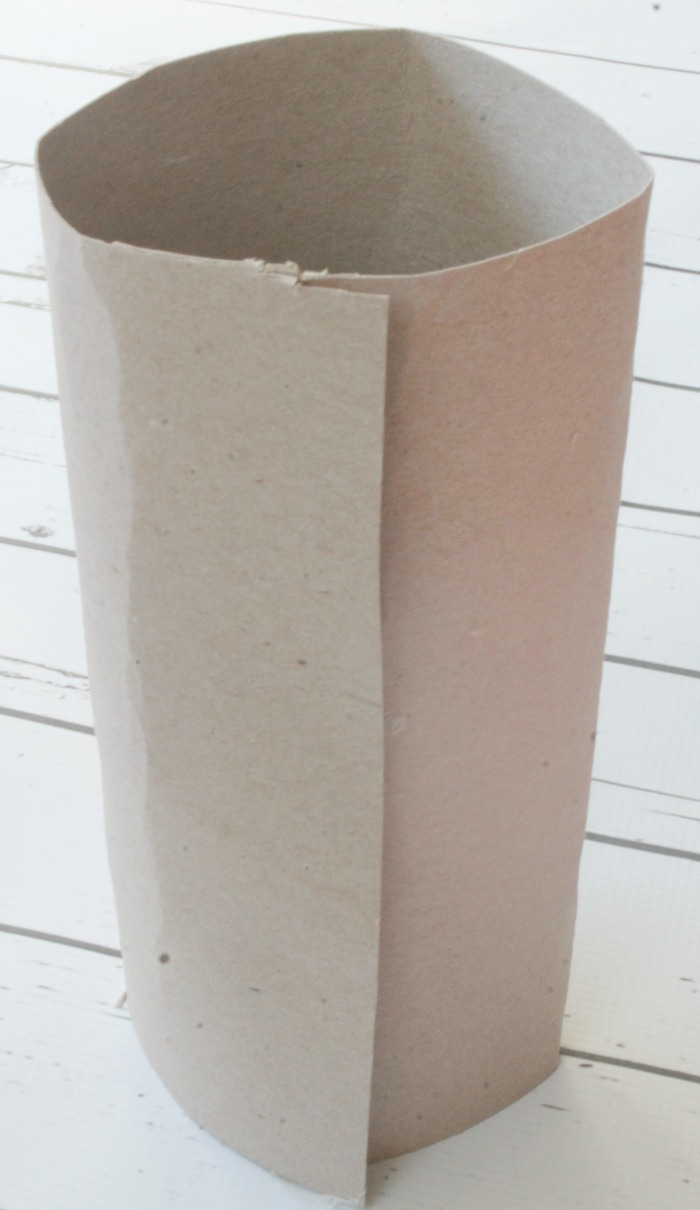
Take another piece of card board and cut it into a large rectangle about 8-10 inches high depending on how big you want your cat to be. Once you’ve cut your piece your are going to fold it over and hot glue the sides together making a long circular tube.
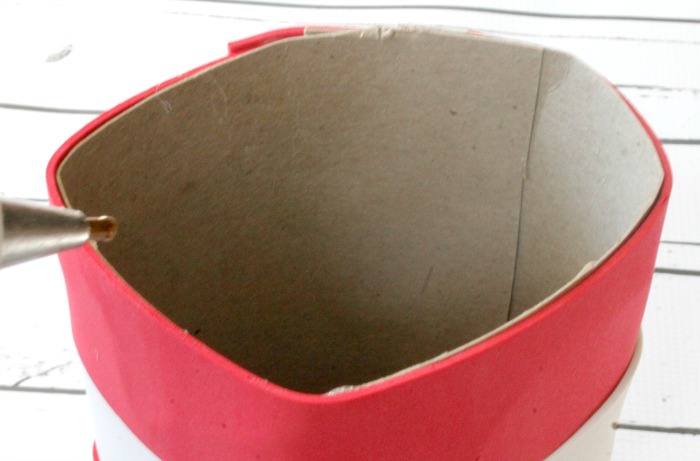
To connect the tube to the base just hot glue around one of the bottoms of the tube and stick onto the white base. (I sort of messed up this step and did the bottom red and the top white).

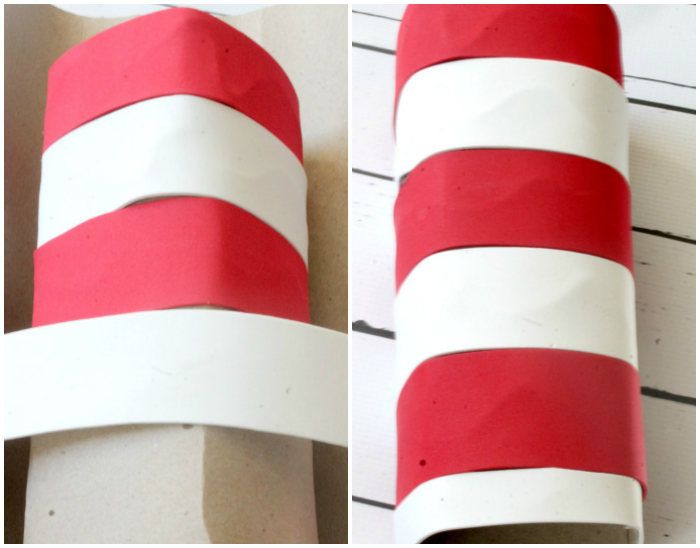
Now take your foam strips and hot glue them to the circular tube one at a time rotating the colors. You’ll want to do red at the very top, then white, then red and so forth until you reach the bottom.
Once you have glued on all of the strips hot glue the red circle base to the top of the hat.
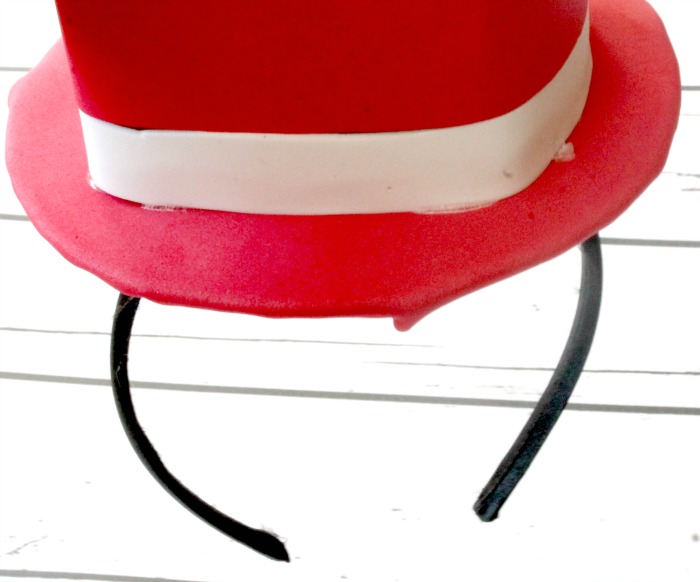
After you have your hat done you need to hot glue the headband onto the bottom of the hat which is the white circle. Make sure you put enough hot glue on to make the headband stick.
Homemade Dr Seuss Hats make a fun Dr Seuss Hat Activity
That’s it! All in all it took me about 15 minutes to make these homemade Dr Seuss hats. I think this Dr Seuss hat activity would be great for a class of students, for a Dr Seuss themed birthday or to make at home with your kiddos.
Want More Cat In The Hat Activities?
If you’re looking for more Dr Seuss Hat Crafts then make sure you check out this Dr Seuss Cat in the Hat Slime.
